Anonymark Practical Cookbook & Recipes
Step-by-step practical recipes and power workflows for Anonymark.
Step-by-step recipes for sanitizing application screenshots, batch-processing documentation assets, and integrating anonymark into release pipelines.
View on GitHub 📖 Open User Guide →
Table of Contents
- Recipe 1: One-Step Interactive Capture for GitHub Issues & PRs
- Recipe 2: Sanitizing a Full App Screenshot with Synthetic Data
- Recipe 3: Producing Explicit Redaction Pills for Security Audits
- Recipe 4: Batch-Anonymizing a Directory of Documentation Screenshots
- Recipe 5: Creating a macOS Raycast / Keyboard Maestro Quick-Capture Hotkey
Recipe 1: One-Step Interactive Capture for GitHub Issues & PRs
Scenario: You need to paste a screenshot of a live network tool, terminal window, or API client into a public GitHub issue without exposing your home subnet IPs or macOS username.
Step-by-Step Instructions
- Run
anonymark capturefrom your terminal:anonymark capture -out ~/Desktop/sanitized_issue.png - Your cursor turns into the native macOS crosshair (
screencapture -i). PressSpaceto switch to window capture mode, or drag a rectangle over the target area. - As soon as you release the mouse button,
anonymarkruns Vision OCR on the temporary capture, replaces all private IPs, MACs, hostnames, and/Users/<you>paths in-place, and writes~/Desktop/sanitized_issue.png.
Pro-Tip: Copy the resulting PNG directly to the macOS clipboard in one line:
anonymark capture -out /tmp/snap.png && osascript -e 'set the clipboard to (read (POSIX file "/tmp/snap.png") as TIFF picture)'
Recipe 2: Sanitizing a Full App Screenshot with Synthetic Data
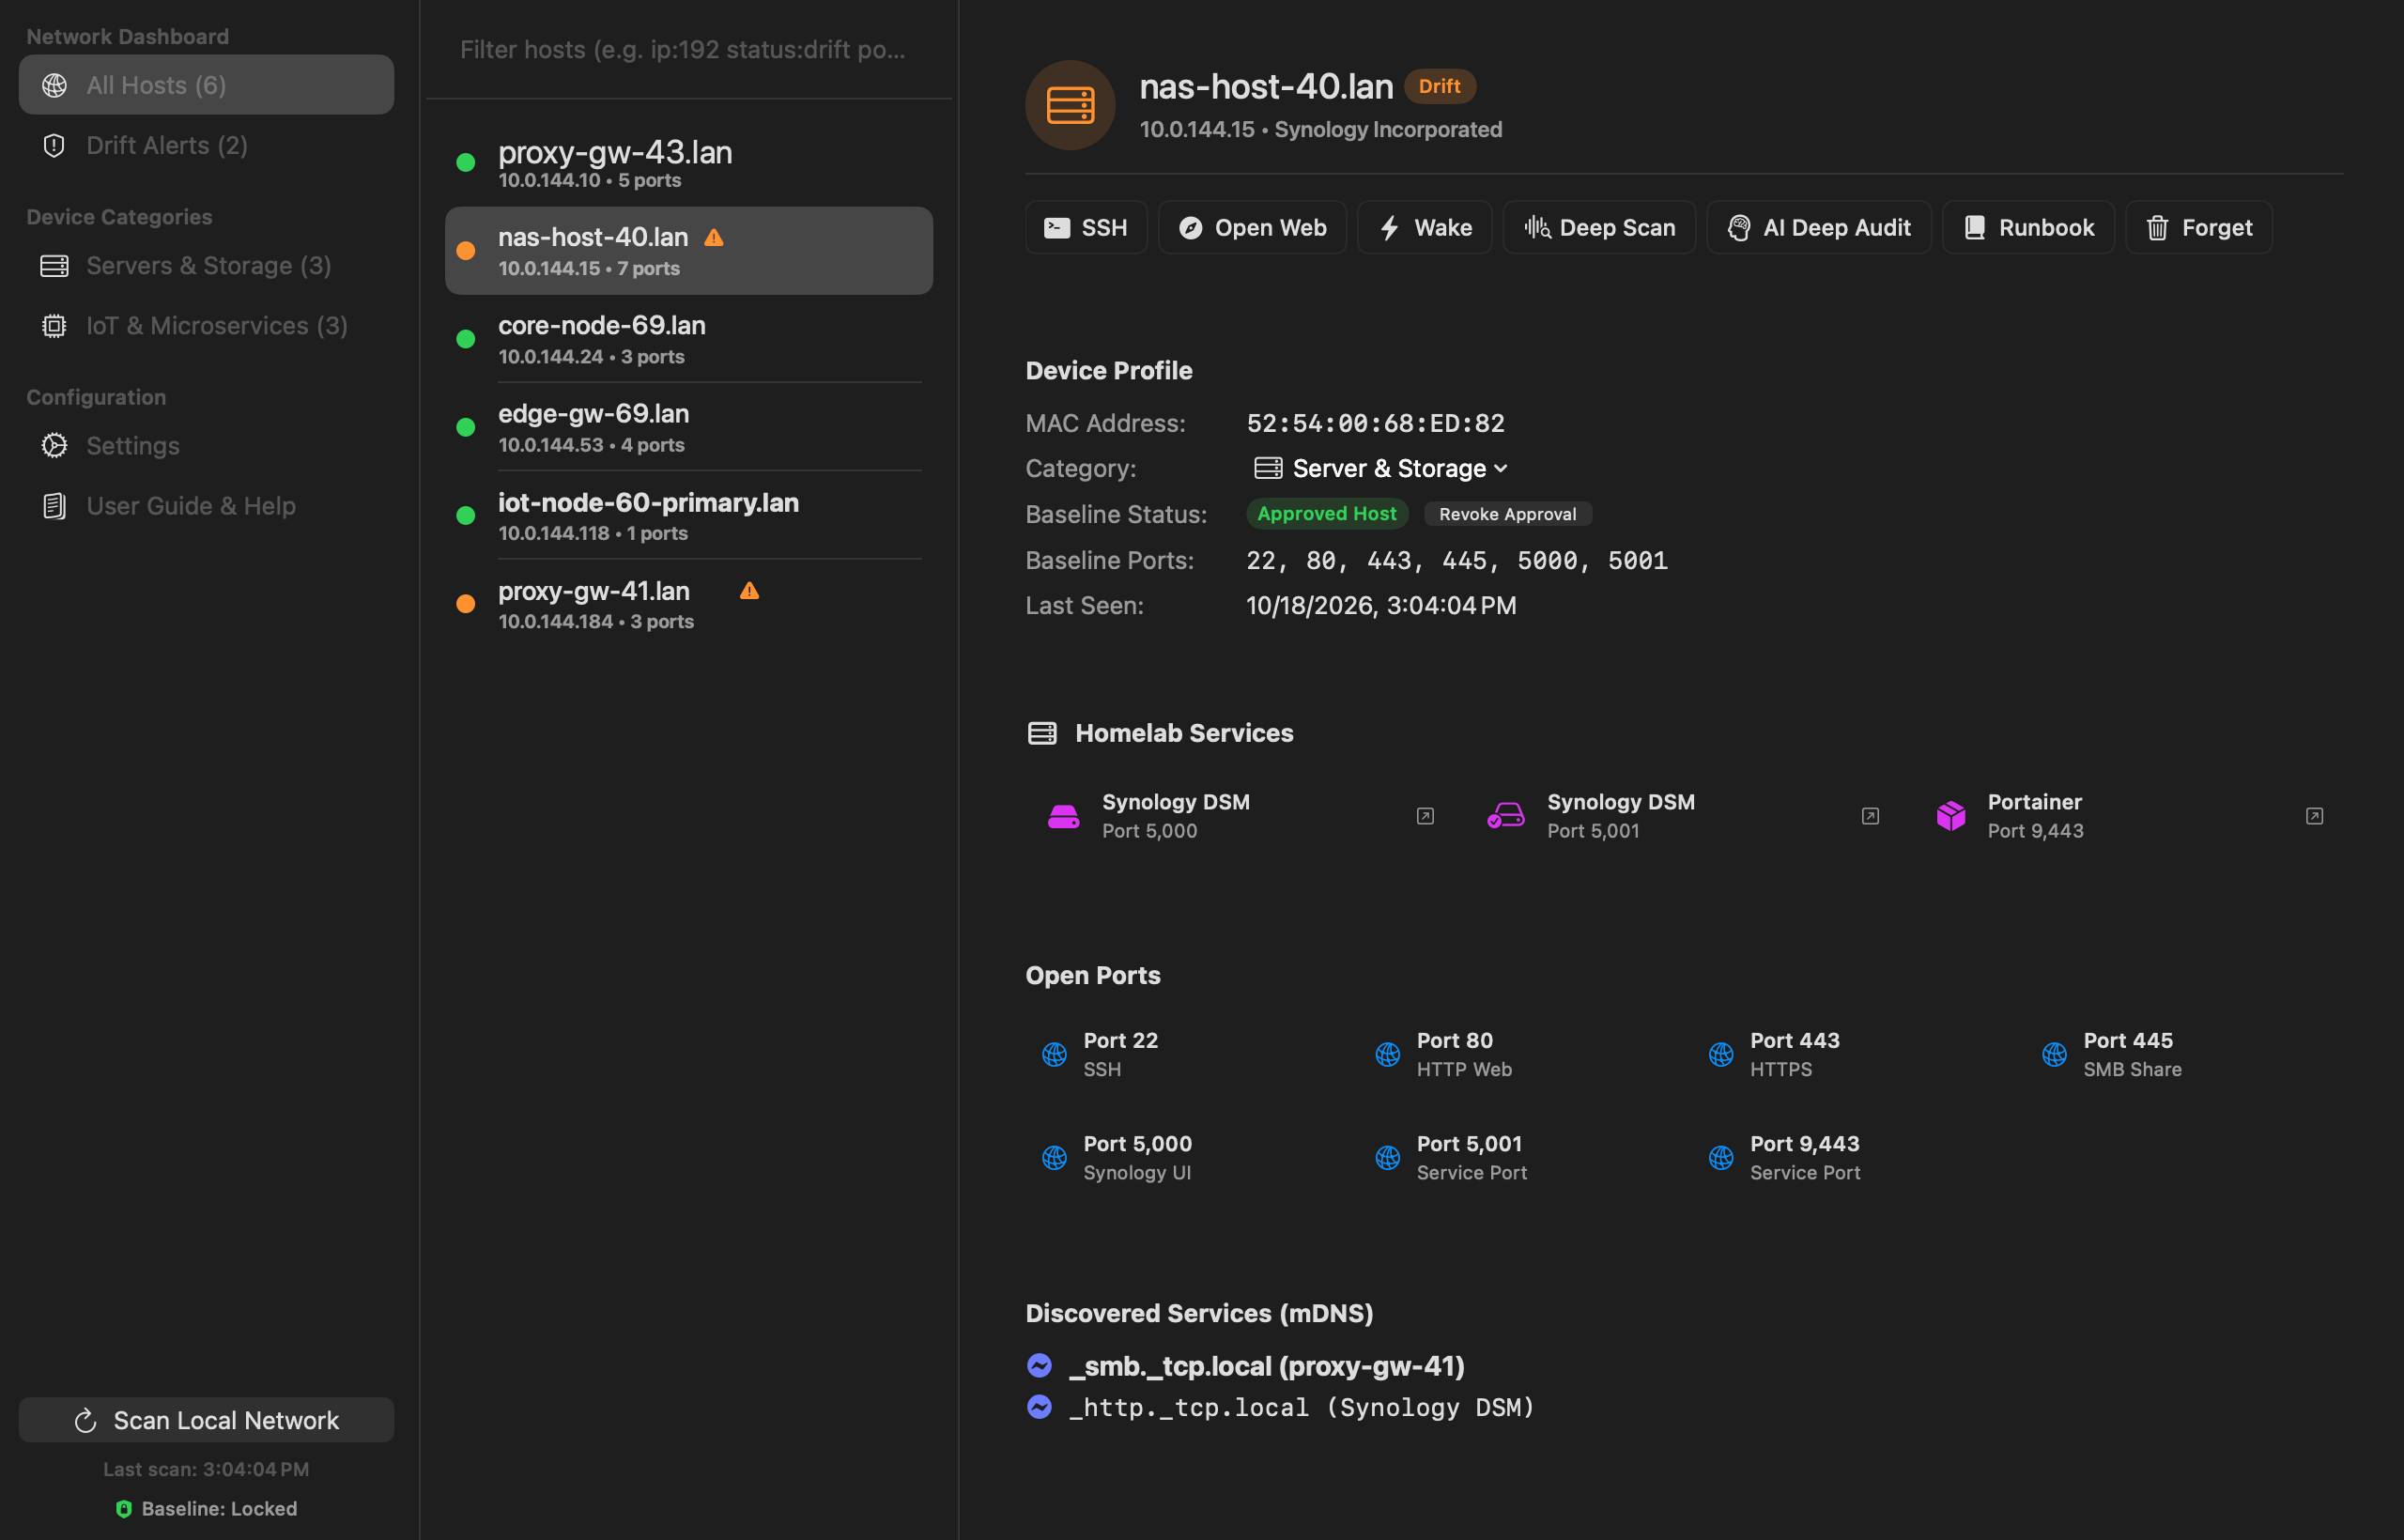
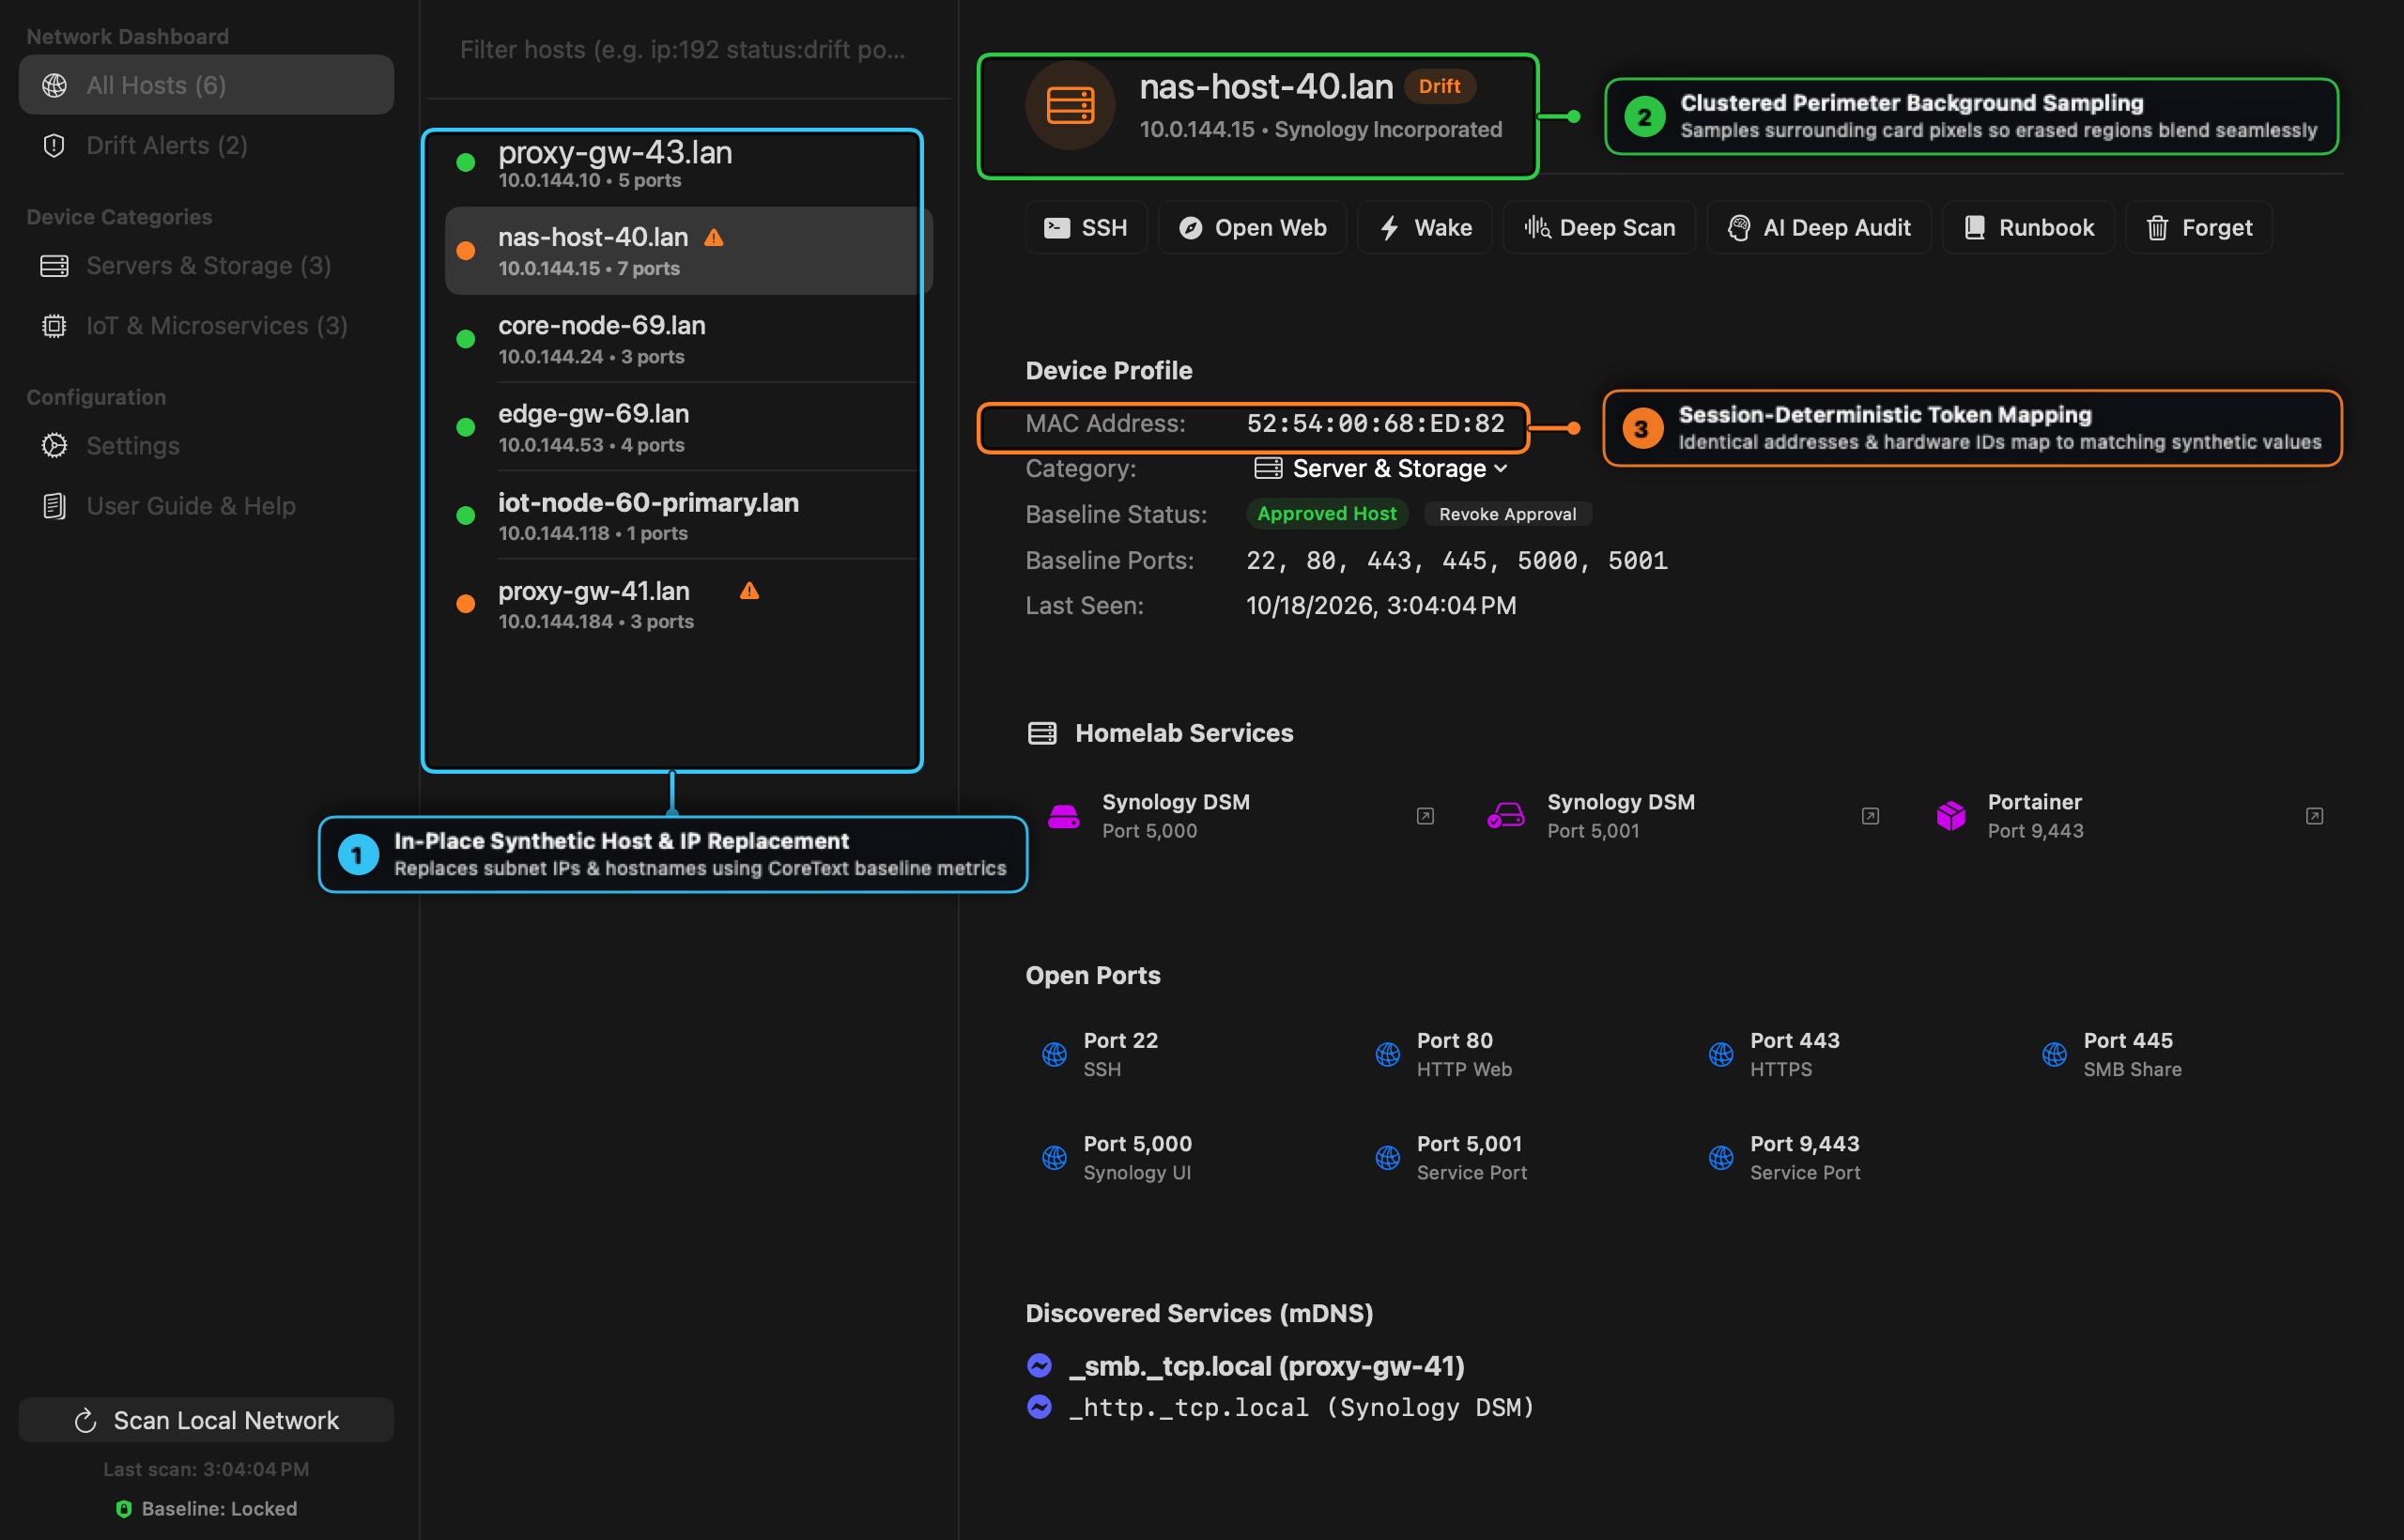
Scenario: You already captured a high-resolution dark-mode window screenshot (raw_window.png) and want every IP, MAC address, and .lan hostname replaced with realistic synthetic equivalents that preserve the original font weight and background shade.
Step-by-Step Instructions
- Run
anonymark processinsyntheticmode (the default):anonymark process raw_window.png -out docs/assets/workbench.png -mode synthetic - Inspect the output image:
- Subnet IPs are mapped deterministically to a single
10.0.<subnet>.<octet>range so host relationships remain coherent. - Vertically aligned sidebar rows snap to a uniform left margin and font size.
- Adjacent status badges (such as
Driftor warning triangles) remain untouched.
- Subnet IPs are mapped deterministically to a single
Recipe 3: Producing Explicit Redaction Pills for Security Audits
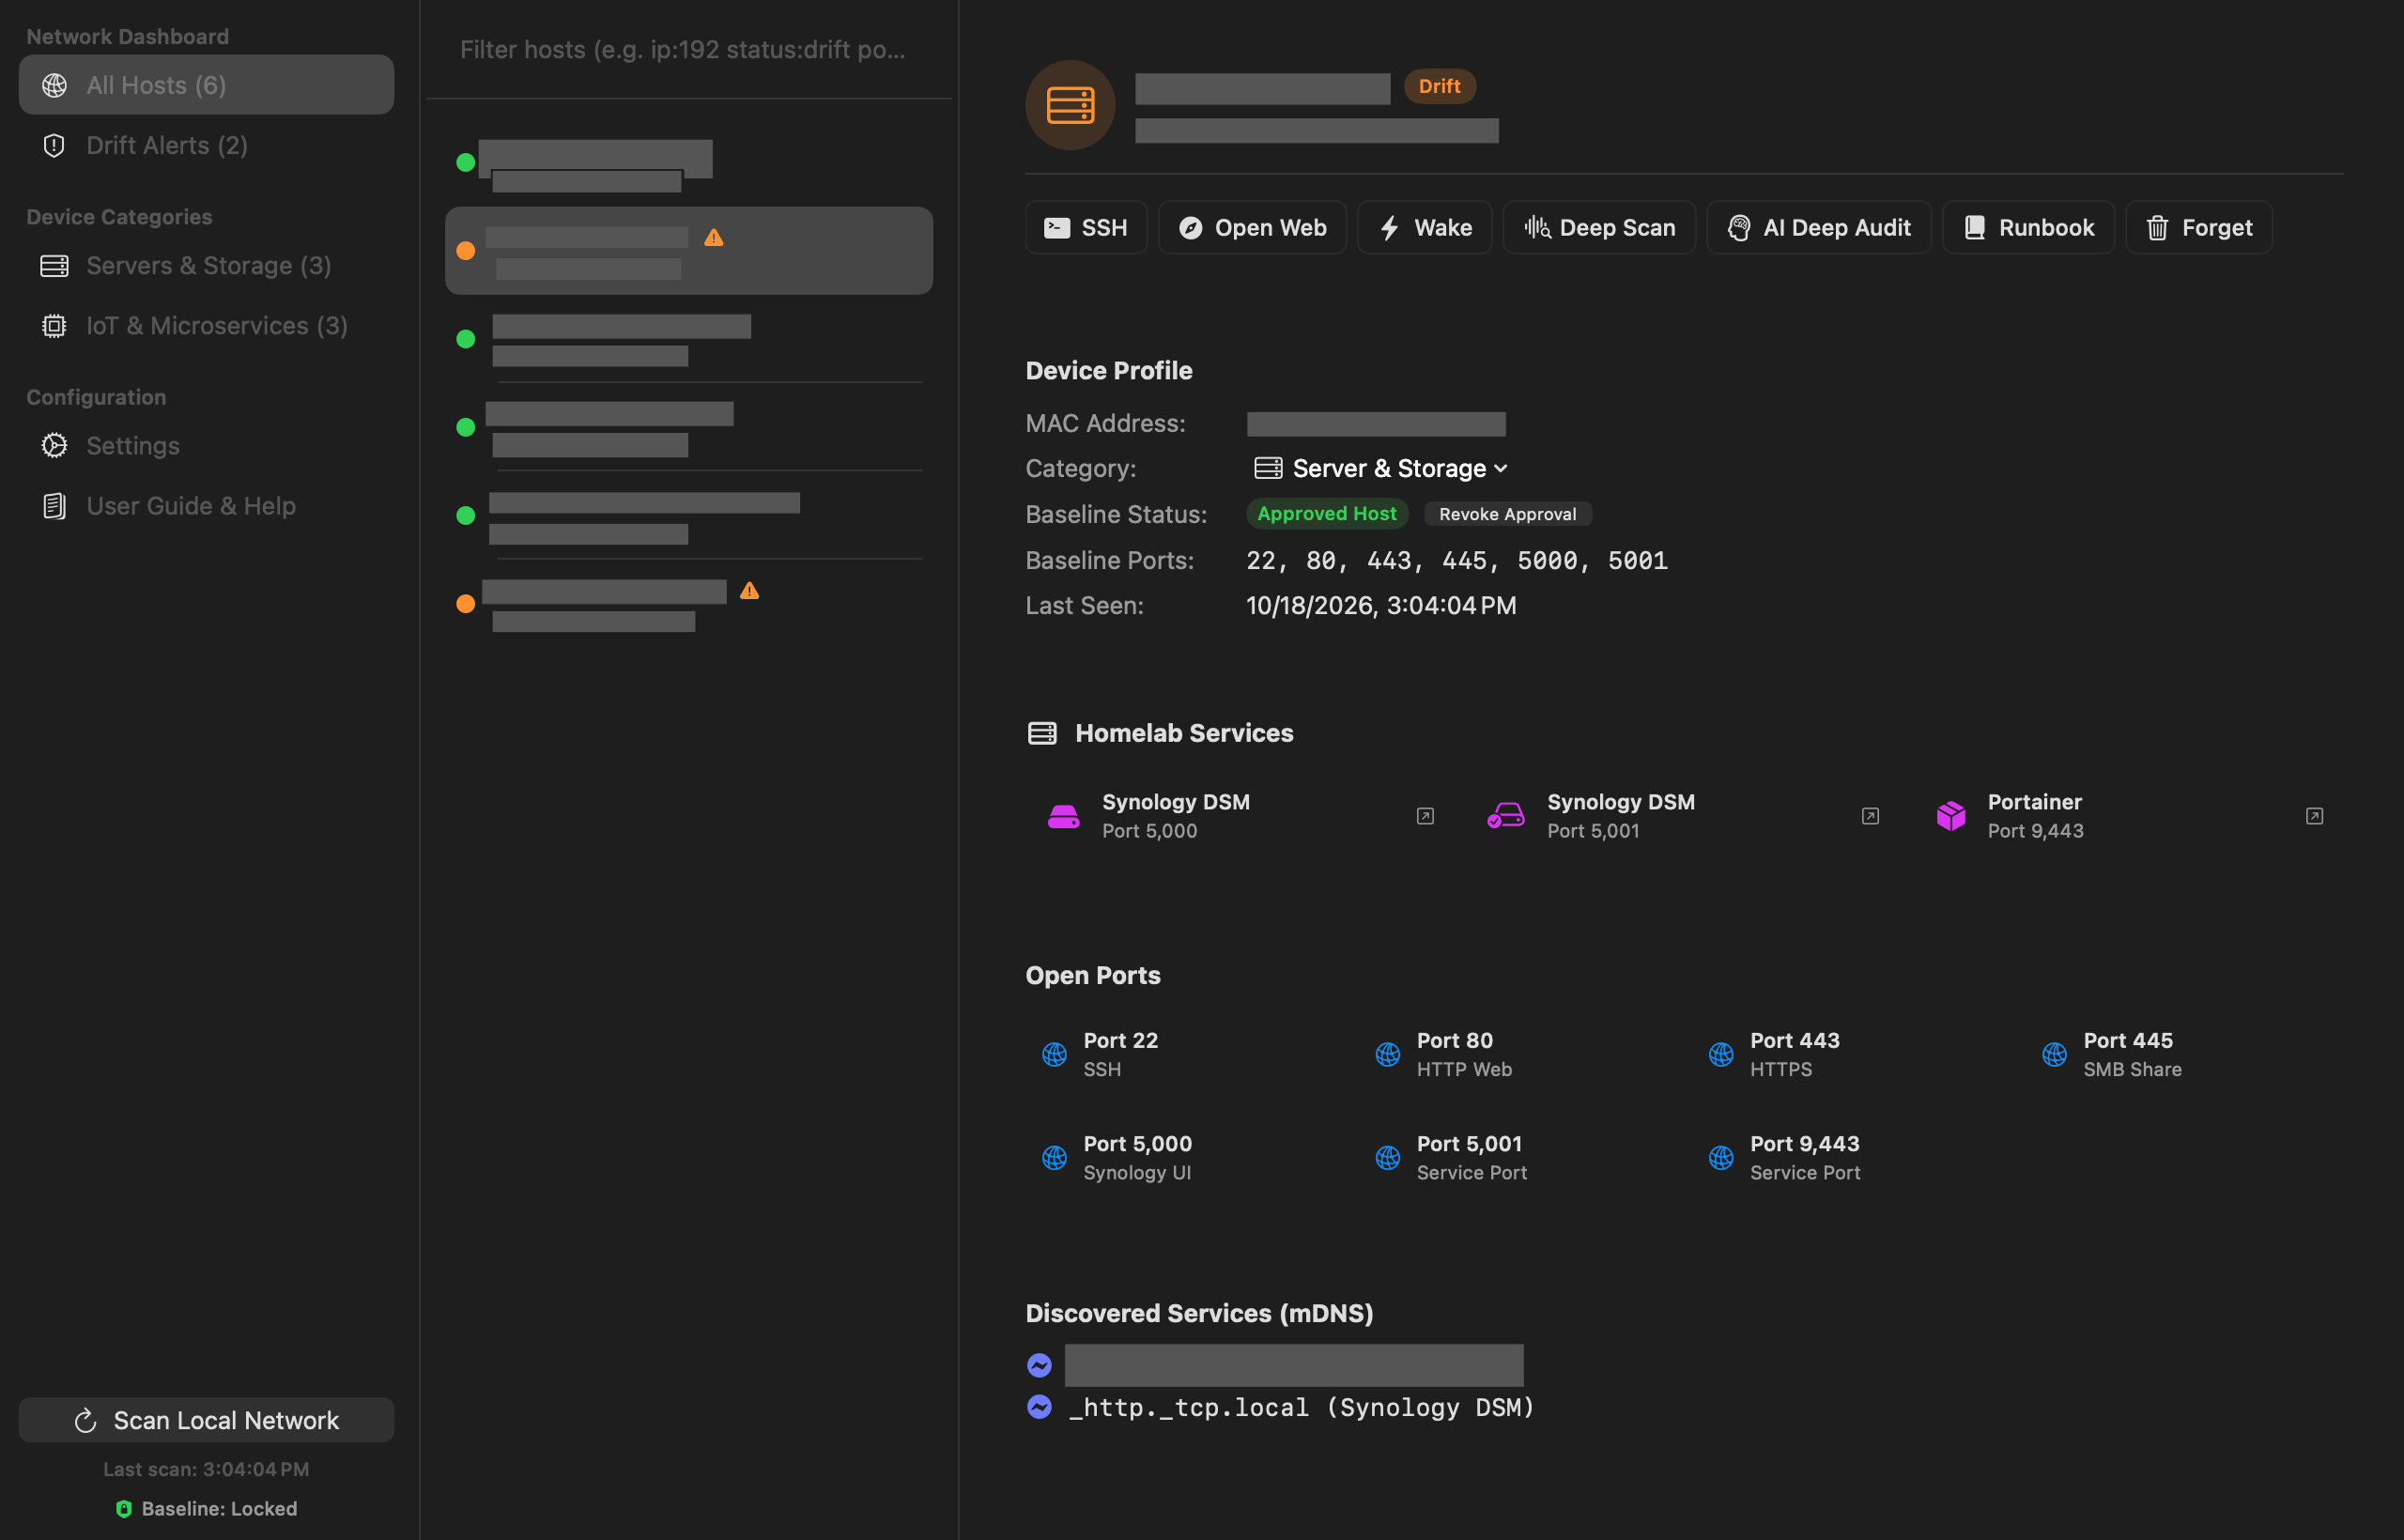
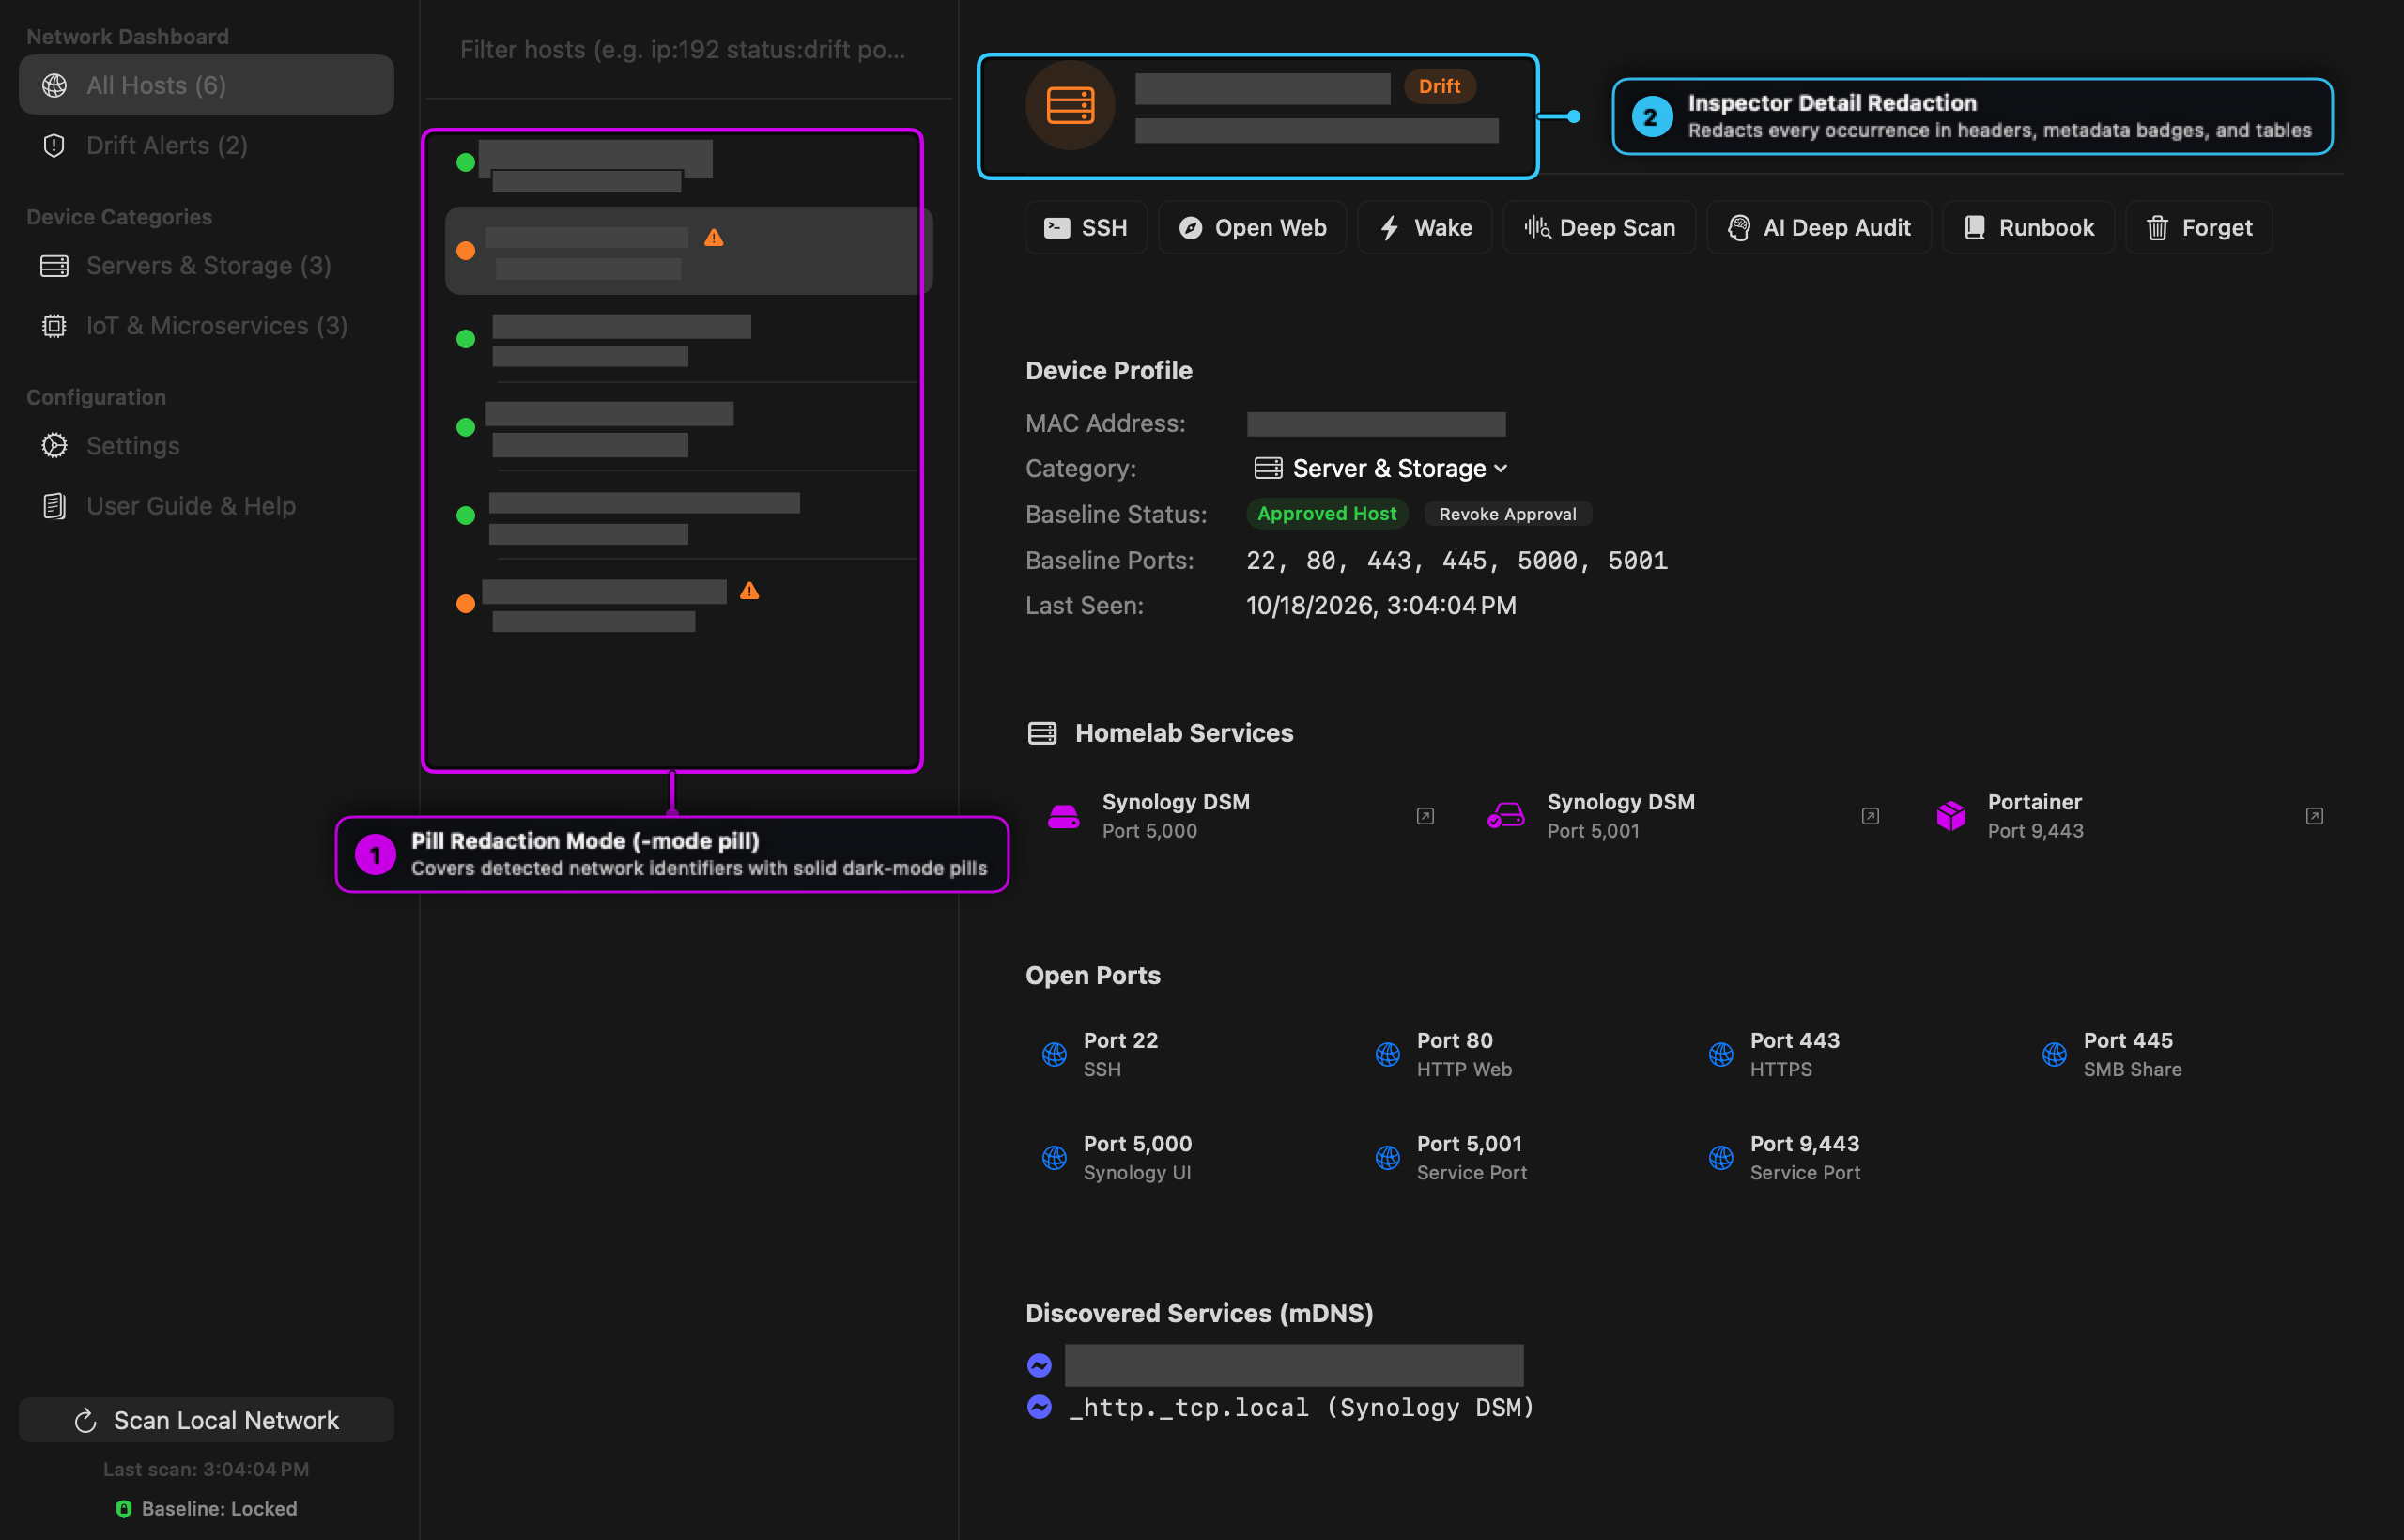
Scenario: For a compliance report or incident post-mortem, you want readers to see explicitly where sensitive identifiers were redacted rather than substituting synthetic names.
Step-by-Step Instructions
- Pass
-mode pilltoanonymark process:anonymark process raw_window.png -out audit_redacted.png -mode pill - Every detected hostname, IP address, and MAC address bounding box is replaced with a clean dark-gray pill (
#505050) after erasing the underlying glyph ink.
Recipe 4: Batch-Anonymizing a Directory of Documentation Screenshots
Scenario: You have a folder of raw screenshots (raw_shots/*.png) for a documentation update and want to sanitize all of them into docs/assets/.
Step-by-Step Instructions
Run a simple shell loop over the input directory:
mkdir -p docs/assets
for img in raw_shots/*.png; do
  base="$(basename "$img")"
  anonymark process "$img" -out "docs/assets/$base" -mode synthetic
done
Recipe 5: Creating a macOS Raycast / Keyboard Maestro Quick-Capture Hotkey
Scenario: You want a global macOS shortcut (Cmd+Shift+6) that captures a screen region, anonymizes it in-place with anonymark, and places the sanitized image directly on your clipboard.
Step-by-Step Instructions
Create an executable script at ~/.local/bin/anonymark-clip:
#!/usr/bin/env zsh
set -euo pipefail

TMP_OUT="/tmp/anonymark_clip_$$.png"
trap 'rm -f "$TMP_OUT"' EXIT

/usr/local/bin/anonymark capture -out "$TMP_OUT" -mode synthetic
osascript -e "set the clipboard to (read (POSIX file "$TMP_OUT") as TIFF picture)"
Make it executable (chmod +x ~/.local/bin/anonymark-clip) and bind it to a hotkey in Raycast, Alfred, or macOS Shortcuts.